m (→Notes) Tag: Visual edit |
(added staff of rebirth, still need to update with all the new bilge famed staves) Tag: Source edit |
||
| (15 intermediate revisions by 6 users not shown) | |||
| Line 4: | Line 4: | ||
The '''Voodoo Staff''' is a magical item which can send quick energy blasts or even more powerful special attacks, such as Flaming Skull, or Desolation. You hold down the Left-Mouse button or the Ctrl button to charge it up. The staff is a widely respected weapon and widely used around the Caribbean for its power to destroy many enemies at once. |
The '''Voodoo Staff''' is a magical item which can send quick energy blasts or even more powerful special attacks, such as Flaming Skull, or Desolation. You hold down the Left-Mouse button or the Ctrl button to charge it up. The staff is a widely respected weapon and widely used around the Caribbean for its power to destroy many enemies at once. |
||
| − | Even more powerful than a [[Voodoo Doll]], staves (or staffs, as |
+ | Even more powerful than a [[Voodoo Doll]], staves (or staffs, as some pirates like to call them) allow a pirate to use voodoo spells against enemies at a distance. Unlike the voodoo doll, the staff does not have to be attuned to a target first. Most of the [[voodoo]] spells are line-of-sight or have an area or aura effect. |
==Level Up!== |
==Level Up!== |
||
| Line 26: | Line 26: | ||
==Use== |
==Use== |
||
| − | Unlike a voodoo doll, which requires the user to attune their enemy or friend, the staff user just has to aim at their targets. The staff can however not be used to heal allies. To use a staff spell, hold down Ctrl or the Left-Mouse button to 'charge' up the staff before releasing the full spell. Each full casting takes voodoo power. The stronger the spell, the more voodoo it takes and the longer time it takes to cast. |
+ | Unlike a voodoo doll, which requires the user to attune their enemy or friend, the staff user just has to aim at their targets. The staff can however not be used to heal allies outside of the [[Nature Aura]] ability. To use a staff spell, hold down Ctrl or the Left-Mouse button to 'charge' up the staff before releasing the full spell. Each full casting takes voodoo power. The stronger the spell, the more voodoo it takes and the longer time it takes to cast. |
If the spell is interrupted, or the user releases the attack key before the spell is complete, it 'fizzles' and there is no effect at all. |
If the spell is interrupted, or the user releases the attack key before the spell is complete, it 'fizzles' and there is no effect at all. |
||
| − | A user can also quickly click the attack button to release a [[Blast]]. |
+ | A user can also quickly click the attack button to release a [[Blast]]. Blast only deals marginal damage, but restores 50 voodoo per hit. |
| + | |||
| + | It does take time to charge most staff attacks, so when using it be aware that the enemy will attack you while you are charging unless the enemy is killed with one attack. |
||
==Types of Staves== |
==Types of Staves== |
||
| Line 37: | Line 39: | ||
<td bgcolor="#372308">'''Crude *''' |
<td bgcolor="#372308">'''Crude *''' |
||
</td></table> |
</td></table> |
||
| − | |||
<table style="color:#c4d400;"> |
<table style="color:#c4d400;"> |
||
<td bgcolor="#1f230c">'''Common''' |
<td bgcolor="#1f230c">'''Common''' |
||
</td></table> |
</td></table> |
||
| − | |||
<table style="color:#44813c;"> |
<table style="color:#44813c;"> |
||
<td bgcolor="#162f12">'''Rare''' |
<td bgcolor="#162f12">'''Rare''' |
||
</td></table> |
</td></table> |
||
| + | <table style="color:#6782c9;"> |
||
| − | |||
| − | + | <td bgcolor="#131524">'''Famed''' |
|
| − | </td |
+ | </td></table> |
| − | |||
<table style="color:#ef0e0c;"> |
<table style="color:#ef0e0c;"> |
||
| − | <td bgcolor="#57070a">'''Legendary |
+ | <td bgcolor="#57070a">'''Legendary''' |
</td></table> |
</td></table> |
||
| − | + | ''*There are no Crude Staves available in the game.'' |
|
| − | <table |
+ | <table style="border: 2px solid black;" cellspacing="2" cellpadding="2" border="1"> |
| − | <th |
+ | <th style="color:#FFFFFF" width="20" bgcolor="#183351" align="center" text>Rarity</th> |
| ⚫ | |||
| ⚫ | |||
| ⚫ | |||
| ⚫ | |||
| + | <th style="color:#FFFFFF" width="130" bgcolor="#183351" align="center" text>Cost</th> |
||
| + | <tr><td bgcolor="#c4d400"></td> |
||
| ⚫ | |||
| + | <td>'''[[Bone Staff]]'''</td> |
||
| + | <td style="text-align: center">3</td> |
||
| + | <td style="text-align: center">5</td> |
||
| + | <td>[[Dark Aura]] 1</td> |
||
| + | <td style="text-align: center">3,610g</td></tr> |
||
| − | < |
+ | <tr><td bgcolor="#44813c"> </td><td>'''[[Burnt Staff]]'''</td> |
| + | <td style="text-align: center">22</td> |
||
| + | <td style="text-align: center">16</td> |
||
| + | <td>[[Dark Aura]] 1, [[Flaming Skull]] +2</td> |
||
| ⚫ | |||
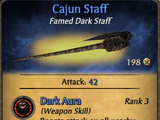
| + | <tr><td bgcolor="#6782c9"> </td><td>[[Cajun Staff|'''Cajun Staff''']]</td> |
||
| ⚫ | |||
| + | <td style="text-align: center">42</td> |
||
| + | <td style="text-align: center">28</td> |
||
| + | <td>[[Dark Aura]] 3, [[Flaming Skull]] +3, [[Conservation]] +2</td> |
||
| + | <td style="text-align: center">[[Loot]] from [[Raven's Cove]]</td></tr><tr><td bgcolor="#44813c"> </td> |
||
| + | <td>'''[[Candy Cane Staff]]'''</td> |
||
| ⚫ | |||
| + | <td style="text-align: center">25</td> |
||
| + | <td style="text-align: center">17</td> |
||
| + | <td>[[Conservation]] +2, [[Healing Boost]] 2</td> |
||
| + | <td style="text-align: center">600 Small [[Moonstones]], 400 Large Moonstones</td></tr> |
||
| + | <tr><td bgcolor="#44813c"> </td> |
||
| ⚫ | |||
| − | + | <td>'''[[Charred Staff]]'''</td> |
|
| − | + | <td style="text-align: center">30</td> |
|
| + | <td style="text-align: center">22</td> |
||
| + | <td>[[Dark Aura]] 2, [[Flaming Skull]] +2, [[Conservation]] +1</td> |
||
| + | <td style="text-align: center">600 Large Bones, 2 Haunted Bones / [[Loot]] from [[Raven's Cove]]</td></tr> |
||
| − | <tr><td bgcolor="# |
+ | <tr><td bgcolor="#6782c9"> </td> |
| + | <td>'''[[Corpse Staff]]''' </td> |
||
| ⚫ | |||
| + | <td style="text-align: center">36</td> |
||
| + | <td style="text-align: center">30</td> |
||
| + | <td>[[Flaming Skull]] +3, [[Spirit Mastery]] +2 </td> |
||
| + | <td style="text-align: center">150 Small Bones 250 Large Bones 40 Haunted Bones</td></tr> |
||
| − | <tr><td bgcolor="# |
+ | <tr><td bgcolor="#c4d400"> </td> |
| + | <td>'''[[Cursed Staff]]''' [[Weapon Unlock: Voodoo Staff|(Quest)]]</td> |
||
| ⚫ | |||
| + | <td style="text-align: center">2</td> |
||
| + | <td style="text-align: center">30</td> |
||
| + | <td>None</td><td style="text-align: center">Free/100g</td></tr> |
||
| + | <tr><td bgcolor="#6782c9"> </td> |
||
| − | <tr><td bgcolor="#6782c9"> </td><td>'''[[Corpse Staff]]''' </td><td style="text-align: center">36</td><td style="text-align: center">30</td><td>[[Flaming Skull]] +3, [[Spirit Mastery]] +2 <td style="text-align: center">150 Small Bones 250 Large Bones 40 Haunted Bones</td></tr> |
||
| + | <td>'''[[Dark Omen]]''' </td> |
||
| + | <td style="text-align: center">45</td> |
||
| + | <td style="text-align: center">30</td> |
||
| + | <td>[[Flaming Skull]] +3, [[Concentration]] +3, [[Dark Curse]] 3</td> |
||
| + | <td style="text-align: center">[[Loot]]</td></tr> |
||
| + | <tr><td bgcolor="#c4d400"> </td> |
||
| − | <tr><td bgcolor="#c4d400"> </td><td>'''[[Cursed Staff]]''' [[Weapon Unlock: Voodoo Staff|(Quest)]]</td><td style="text-align: center">2</td><td style="text-align: center">Notoriety 30</td><td>None</td><td style="text-align: center">Free/100g</td></tr> |
||
| + | <td>'''[[Death Staff]]'''</td> |
||
| + | <td style="text-align: center">28</td> |
||
| + | <td style="text-align: center">25</td> |
||
| + | <td>[[Dark Aura]] 1</td> |
||
| + | <td style="text-align: center">22,050g</td></tr> |
||
| − | <tr><td bgcolor="#c4d400"> </td> |
+ | <tr><td bgcolor="#c4d400"> </td> |
| + | <td>'''[[Defender Staff]]'''</td> |
||
| − | </td><td style="text-align: center">28</td><td style="text-align: center">25</td><td>[[Dark Aura]] 1</td><td style="text-align: center">22,050g</td></tr> |
||
| + | <td style="text-align: center">4</td> |
||
| + | <td style="text-align: center">7</td> |
||
| + | <td>[[Warding Aura]] 1</td> |
||
| + | <td style="text-align: center">5,670g</td></tr> |
||
| − | <tr><td bgcolor="# |
+ | <tr><td bgcolor="#6782c9"> </td> |
| + | <td>'''[[Demon Skull Staff]]''' </td> |
||
| − | </td><td style="text-align: center">4</td><td style="text-align: center">7</td><td>[[Warding Aura]] 1</td><td style="text-align: center">5,670g</td></tr> |
||
| + | <td style="text-align: center">45</td> |
||
| + | <td style="text-align: center">30</td> |
||
| + | <td>[[Spirit Mastery]] +3, [[Soul Flay]] +2, [[Dark Aura]] 3, [[Immunity|Cursed Immunity]]</td> |
||
| + | <td style="text-align: center">800 Large Bones, 60 Haunted Bones</td></tr> |
||
| − | <tr><td bgcolor="# |
+ | <tr><td bgcolor="#44813c"> </td> |
| + | <td>'''[[Dire Staff]]'''</td> |
||
| − | </td><td style="text-align: center">2</td><td style="text-align: center">2</td><td>[[Soul Flay]] +1</td><td style="text-align: center">N/A</td></tr> |
||
| + | <td style="text-align: center">28</td> |
||
| + | <td style="text-align: center">21</td> |
||
| + | <td>[[Dark Aura]] 2, [[Spirit Mastery]] +2</td> |
||
| + | <td style="text-align: center">[[Redeemable Items|Code]]</td></tr> |
||
| − | <tr><td bgcolor="#c4d400"> </td><td>'''[[ |
+ | <tr><td bgcolor="#c4d400"> </td><td>'''[[Dread Staff]]'''</td> |
| − | + | <td style="text-align: center">2</td> |
|
| + | <td style="text-align: center">2</td> |
||
| + | <td>[[Soul Flay]] +1</td> |
||
| + | <td style="text-align: center">[[Loot]]</td></tr> |
||
| − | <tr><td bgcolor="# |
+ | <tr><td bgcolor="#6782c9"> </td> |
| + | <td>'''[[Exorcism Staff]]''' </td> |
||
| − | </td><td style="text-align: center">23</td><td style="text-align: center">22</td><td>[[Warding Aura]] 1</td><td style="text-align: center">23,960</td></tr> |
||
| + | <td style="text-align: center">38</td> |
||
| + | <td style="text-align: center">26</td> |
||
| + | <td>[[Spirit Lore]] +3, [[Banish]] +3, [[Warding Aura]] 3</td> |
||
| + | <td style="text-align: center">N/A</td></tr> |
||
| + | <tr><td bgcolor="#6782c9"> </td> |
||
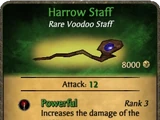
| − | <tr><td bgcolor="#44813c"> </td><td>'''[[Harrow Staff]]''' [[Harrow Staff Upgrade: Roland's Cloudy Orb|(Quest)]]</td><td style="text-align: center">6</td><td style="text-align: center">15</td><td>[[Powerful]] 3</td><td style="text-align: center">Free w/ Quest</td></tr> |
||
| + | <td>'''[[Frostedge Staff]]'''</td> |
||
| + | <td style="text-align: center">41</td> |
||
| + | <td style="text-align: center">30</td> |
||
| + | <td>[[Warding Aura]] 3, [[Wither]] +3, [[Desolation]] +2</td> |
||
| + | <td style="text-align: center">[[Loot]]</td></tr> |
||
| − | <tr><td bgcolor="#c4d400"> </td> |
+ | <tr><td bgcolor="#c4d400"> </td> |
| + | <td>'''[[Grim Staff]] '''</td> |
||
| − | </td><td style="text-align: center">3</td><td style="text-align: center">6</td><td>[[Nature Aura]] 1</td><td style="text-align: center">4,340g</td></tr> |
||
| + | <td style="text-align: center">10</td> |
||
| + | <td style="text-align: center">10</td> |
||
| + | <td>[[Dark Aura]] 1</td> |
||
| + | <td style="text-align: center">600</td></tr> |
||
| − | <tr><td bgcolor="#c4d400"> </td><td>'''[[ |
+ | <tr><td bgcolor="#c4d400"> </td><td>'''[[Guardian Staff]] '''</td> |
| − | + | <td style="text-align: center">23</td> |
|
| + | <td style="text-align: center">22</td> |
||
| + | <td>[[Warding Aura]] 1</td> |
||
| + | <td style="text-align: center">23,960</td></tr> |
||
| + | |||
| + | <tr><td bgcolor="#44813c"> </td> |
||
| + | <td>'''[[Harrow Staff]]''' [[Harrow Staff Upgrade: Roland's Cloudy Orb|(Quest)]]</td> |
||
| + | <td style="text-align: center">6</td> |
||
| + | <td style="text-align: center">15</td> |
||
| + | <td>[[Powerful]] 3</td> |
||
| + | <td style="text-align: center">Free w/ Quest</td></tr> |
||
| + | |||
| + | <tr><td bgcolor="#c4d400"> </td> |
||
| + | <td>'''[[Healing Staff]]'''</td> |
||
| + | <td style="text-align: center">3</td> |
||
| + | <td style="text-align: center">6</td> |
||
| + | <td>[[Nature Aura]] 1</td> |
||
| + | <td style="text-align: center">4,340g</td></tr> |
||
| + | |||
| + | <tr><td bgcolor="#c4d400"> </td> |
||
| + | <td>'''[[Juju Staff]]'''</td> |
||
| + | <td style="text-align: center">1</td> |
||
| + | <td style="text-align: center">5</td> |
||
| + | <td>[[Blast]] +1</td> |
||
| + | <td style="text-align: center">[[Loot]]</td></tr> |
||
<tr><td bgcolor="#c4d400"> </td><td>'''[[Life Staff]]''' |
<tr><td bgcolor="#c4d400"> </td><td>'''[[Life Staff]]''' |
||
| Line 114: | Line 207: | ||
<tr><td bgcolor="#c4d400"> </td><td>'''[[Overseer Staff]]''' |
<tr><td bgcolor="#c4d400"> </td><td>'''[[Overseer Staff]]''' |
||
</td><td style="text-align: center">16</td><td style="text-align: center">17</td><td>[[Warding Aura]] 1</td><td style="text-align: center">15,750g</td></tr> |
</td><td style="text-align: center">16</td><td style="text-align: center">17</td><td>[[Warding Aura]] 1</td><td style="text-align: center">15,750g</td></tr> |
||
| + | |||
| + | <tr><td bgcolor="#c4d400"> </td><td>'''[[Rend Staff]]''' |
||
| + | </td><td style="text-align: center">4</td> |
||
| + | <td style="text-align: center">10</td> |
||
| + | <td>[[Powerful]] 2</td> |
||
| + | <td style="text-align: center">N/A |
||
| + | </td></tr> |
||
<tr><td bgcolor="#c4d400"> </td><td>'''[[Renewal Staff]]''' |
<tr><td bgcolor="#c4d400"> </td><td>'''[[Renewal Staff]]''' |
||
| Line 122: | Line 222: | ||
<tr><td bgcolor="#c4d400"> </td><td>'''[[Rotten Staff]]''' |
<tr><td bgcolor="#c4d400"> </td><td>'''[[Rotten Staff]]''' |
||
| − | </td><td style="text-align: center">2</td><td style="text-align: center">3</td><td>None</td><td style="text-align: center"> |
+ | </td><td style="text-align: center">2</td><td style="text-align: center">3</td><td>None</td><td style="text-align: center">[[Loot]]</td> |
| − | <tr><td bgcolor="#c4d400"> </td> |
+ | <tr><td bgcolor="#c4d400"> </td> |
| + | <td>[[Singed Staff|'''Singed Staff''']]</td> |
||
| + | <td style="text-align: center">10</td> |
||
| + | <td style="text-align: center">10</td> |
||
| + | <td>[[Dark Aura]] 1, [[Flaming Skull]] +1</td> |
||
| + | <td style="text-align: center">[[Loot]]</td></tr><tr><td bgcolor="#c4d400"> </td><td>'''[[Skeletal Staff]]''' |
||
</td><td style="text-align: center">16</td><td style="text-align: center">15</td><td>[[Dark Aura]] 1</td><td style="text-align: center">11,250g</td></tr> |
</td><td style="text-align: center">16</td><td style="text-align: center">15</td><td>[[Dark Aura]] 1</td><td style="text-align: center">11,250g</td></tr> |
||
| Line 131: | Line 236: | ||
<tr><td bgcolor="#44813c"> </td><td>'''[[Spirit Burner Staff]]''' |
<tr><td bgcolor="#44813c"> </td><td>'''[[Spirit Burner Staff]]''' |
||
| − | </td><td style="text-align: center">12</td><td style="text-align: center">8</td><td>[[Dark Aura]] 2, [[Soul Flay]] +2, [[Blast]] +1</td><td style="text-align: center"> |
+ | </td><td style="text-align: center">12</td><td style="text-align: center">8</td><td>[[Dark Aura]] 2, [[Soul Flay]] +2, [[Blast]] +1</td><td style="text-align: center">[[Loot]]</td></tr> |
| + | |||
| + | <tr><td bgcolor="#6782c9"> </td> |
||
| + | <td>'''[[Spirit Shredder Staff]]'''</td> |
||
| + | <td style="text-align: center">21</td> |
||
| + | <td style="text-align: center">11</td> |
||
| + | <td>[[Dark Aura]] 3, [[Soul Flay]] +2, [[Blast]] +2</td> |
||
| + | <td style="text-align: center">[[Loot]]</td></tr> |
||
| + | |||
| + | <tr><td bgcolor="#6782c9"> </td><td>'''[[Staff of Ice]]''' |
||
| ⚫ | |||
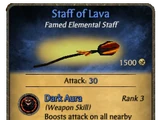
<tr><td bgcolor="#6782c9"> </td><td>'''[[Staff of Lava]]''' |
<tr><td bgcolor="#6782c9"> </td><td>'''[[Staff of Lava]]''' |
||
</td><td style="text-align: center">30</td><td style="text-align: center">25</td><td>[[Dark Aura]] 3, [[Flaming Skull]] +3</td><td style="text-align: center">30 Haunted Bones</td></tr> |
</td><td style="text-align: center">30</td><td style="text-align: center">25</td><td>[[Dark Aura]] 3, [[Flaming Skull]] +3</td><td style="text-align: center">30 Haunted Bones</td></tr> |
||
| + | |||
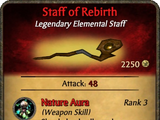
| + | <tr><td bgcolor="#ef0e0c"> </td><td>'''[[Staff of Rebirth]]''' |
||
| + | </td><td style="text-align: center">48 |
||
| + | </td><td style="text-align: center">30 |
||
| + | </td><td>[[Nature Aura]] 4, [[Stun]] [[Immunity]] 1, [[Blast]] +4, [[Concentration]] +3, [[Conservation]] +3 |
||
| + | </td><td style="text-align: center">[[Bilgewater]] [[Loot]] or [[Story Quest: The Keepers of the Code]] Reward |
||
| + | </td></tr> |
||
| + | |||
| + | <tr><td bgcolor="#6782c9"> </td><td>'''[[Staff of Shrunken Heads]]''' |
||
| + | </td><td style="text-align: center">38 |
||
| + | </td><td style="text-align: center">30 |
||
| + | </td><td>[[Dark Aura]] 3, [[Desolation Resistance]] 2, [[Desolation]] +2 |
||
| + | </td><td style="text-align: center">[[Loot]] |
||
| + | </td></tr> |
||
| + | |||
| + | <tr><td bgcolor="#ef0e0c"> </td><td>'''[[Staff of the Hollowed Gem]]''' |
||
| + | </td><td style="text-align: center">52 |
||
| + | </td><td style="text-align: center">30 |
||
| + | </td><td>[[Jumbee Fire]] 5, [[Desolation Resistance]] 4, [[Spirit Lore]] +4, [[Spirit Mastery]] +3, [[Desolation]] +3 |
||
| + | </td><td style="text-align: center">[[Loot]] or 1,050 Large & 3,500 Haunted Bones |
||
| + | </td></tr> |
||
<tr><td bgcolor="#6782c9"> </td><td>'''[[Staff of Water]]''' |
<tr><td bgcolor="#6782c9"> </td><td>'''[[Staff of Water]]''' |
||
| Line 140: | Line 276: | ||
<tr><td bgcolor="#c4d400"> </td><td>'''[[Tribal Staff]] ''' |
<tr><td bgcolor="#c4d400"> </td><td>'''[[Tribal Staff]] ''' |
||
| − | </td><td style="text-align: center">7</td><td style="text-align: center">7</td><td>[[Blast]] +2</td><td style="text-align: center"> |
+ | </td><td style="text-align: center">7</td><td style="text-align: center">7</td><td>[[Blast]] +2</td><td style="text-align: center">30g</td></tr> |
<tr><td bgcolor="#c4d400"> </td><td>'''[[Tribal Chief Staff]]''' |
<tr><td bgcolor="#c4d400"> </td><td>'''[[Tribal Chief Staff]]''' |
||
| Line 150: | Line 286: | ||
<tr><td bgcolor="#44813c"> </td><td>'''[[Vile Staff]]''' [[Vile Staff Upgrade: Unlocking the Orb|(Quest)]]</td><td style="text-align: center">8</td><td style="text-align: center">20</td><td>[[Powerful]] 4</td><td style="text-align: center">Free w/ Quest</td></tr> |
<tr><td bgcolor="#44813c"> </td><td>'''[[Vile Staff]]''' [[Vile Staff Upgrade: Unlocking the Orb|(Quest)]]</td><td style="text-align: center">8</td><td style="text-align: center">20</td><td>[[Powerful]] 4</td><td style="text-align: center">Free w/ Quest</td></tr> |
||
| − | <tr><td bgcolor="#c4d400"> </td> |
+ | <tr><td bgcolor="#c4d400"> </td> |
| + | <td>'''[[Warden Staff]]'''</td> |
||
| − | </td><td style="text-align: center">10</td><td style="text-align: center">12</td><td>[[Warding Aura]] 1</td><td style="text-align: center">10,080g</td></tr> |
||
| + | <td style="text-align: center">10</td> |
||
| + | <td style="text-align: center">12</td> |
||
| + | <td>[[Warding Aura]] 1</td> |
||
| + | <td style="text-align: center">10,080g</td></tr> |
||
| + | |||
| + | <tr><td bgcolor="#c4d400"> </td> |
||
| + | <td>'''[[Warped Staff]]'''</td> |
||
| + | <td style="text-align: center">3</td> |
||
| + | <td style="text-align: center">5</td> |
||
| + | <td>[[Powerful]] 1</td> |
||
| + | <td style="text-align: center">300g</td></tr> |
||
| + | |||
| + | <tr><td bgcolor="#6782c9"> </td><td>'''[[Widow's Pumpkin Staff]] ''' |
||
| + | </td><td style="text-align: center">38 |
||
| + | </td><td style="text-align: center">30 |
||
| + | </td><td>[[Nature Aura]] 4, [[Soul Flay]] +3, [[Focus]] +3 |
||
| + | </td><td style="text-align: center">150 Small [[Bones]], 300 Large Bones, & 45 Haunted Bones |
||
| + | </td></tr> |
||
</table> |
</table> |
||
| − | == |
+ | =='''Voodoo Staff Skills'''== |
The staff greatly enhances the kinds of hexes and abilities the pirate can use with their voodoo power. |
The staff greatly enhances the kinds of hexes and abilities the pirate can use with their voodoo power. |
||
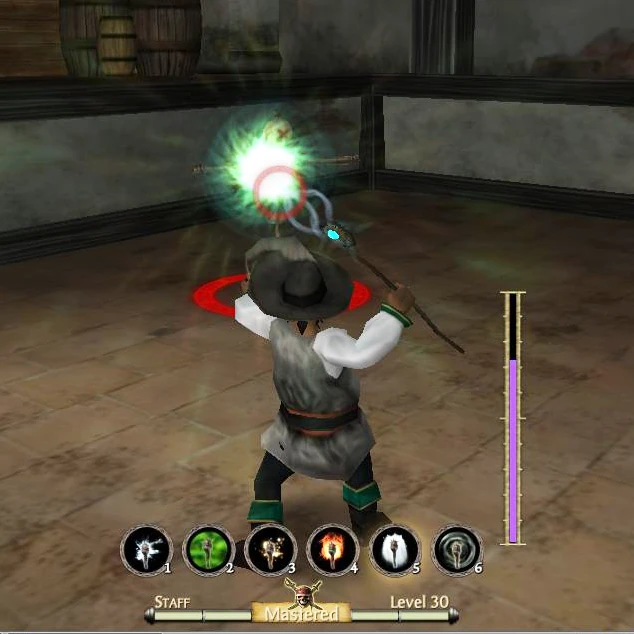
[[File:Staff_blast.jpg|right|210px|Blast]] |
[[File:Staff_blast.jpg|right|210px|Blast]] |
||
| Line 165: | Line 319: | ||
| ⚫ | |||
| − | |||
| ⚫ | |||
Most of the Hexes a pirate can use with a voodoo staff are more intended for attacking a group of enemies from a distance, since the user does NOT have to attune it to them. |
Most of the Hexes a pirate can use with a voodoo staff are more intended for attacking a group of enemies from a distance, since the user does NOT have to attune it to them. |
||
| − | <table |
+ | <table style="border: 2px solid black;" cellspacing="2" cellpadding="2" border="1"> |
| − | <th |
+ | <th style="color:white" bgcolor="#3d273c" align="center" text>Hex</th> |
| − | <th |
+ | <th style="color:white" bgcolor="#3d273c" align="center" text>Description</th> |
| − | <th |
+ | <th style="color:white" bgcolor="#3d273c" align="center" text>Voodoo Power</th> |
| − | <th |
+ | <th style="color:white" bgcolor="#3d273c" align="center" text>Cast Time</th> |
| − | <th |
+ | <th style="color:white" bgcolor="#3d273c" align="center" text>Level Req.</th> |
| − | <th |
+ | <th style="color:white" bgcolor="#3d273c" align="center" text>Icon</th></tr> |
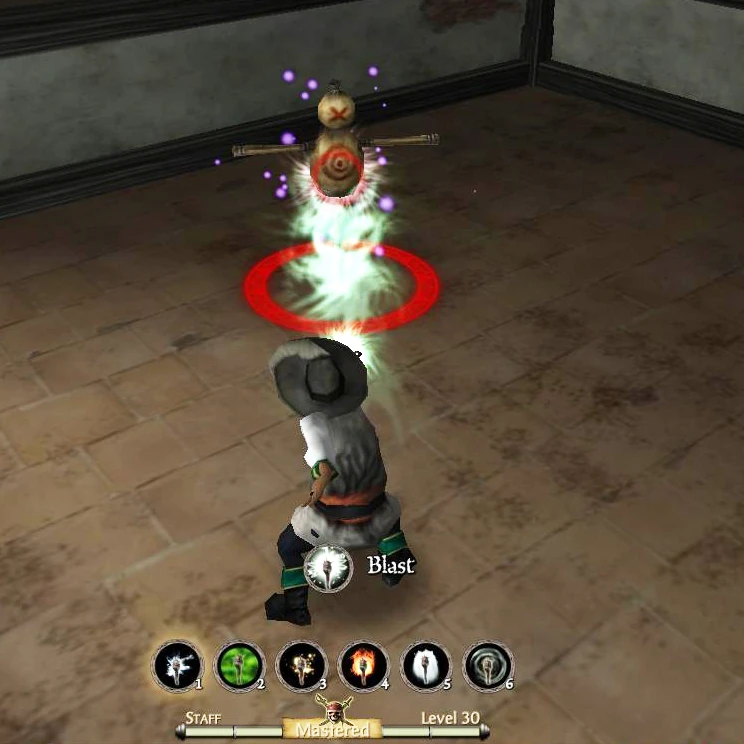
<tr><td>'''[[Blast]]''' |
<tr><td>'''[[Blast]]''' |
||
</td><td>An instant blast of magic.</td><td style="text-align: center">0</td><td style="text-align: center">Instant</td><td style="text-align: center">1</td><td bgcolor="black">[[File:Staff_blast.png]]</td></tr> |
</td><td>An instant blast of magic.</td><td style="text-align: center">0</td><td style="text-align: center">Instant</td><td style="text-align: center">1</td><td bgcolor="black">[[File:Staff_blast.png]]</td></tr> |
||
| Line 204: | Line 357: | ||
</table> |
</table> |
||
| − | === |
+ | ===''Passive Skills''=== |
In addition to hexes the pirate has to cast, the Voodoo Staff also can provide abilities that, once learned, are always in effect. These abilities can also apply to the user's [[Voodoo Doll]] as well. |
In addition to hexes the pirate has to cast, the Voodoo Staff also can provide abilities that, once learned, are always in effect. These abilities can also apply to the user's [[Voodoo Doll]] as well. |
||
| − | <table |
+ | <table style="border: 2px solid black;" cellspacing="2" cellpadding="2" border="1"> |
| − | <th |
+ | <th style="color:white" bgcolor="#3d273c" align="center" text>Hex</th> |
| − | <th |
+ | <th style="color:white" bgcolor="#3d273c" align="center" text>Description</th> |
| − | <th |
+ | <th style="color:white" bgcolor="#3d273c" align="center" text>Level Req.</th> |
| − | <th |
+ | <th style="color:white" bgcolor="#3d273c" align="center" text>Icon</th></tr> |
<tr><td>'''[[Concentration]]''' |
<tr><td>'''[[Concentration]]''' |
||
</td><td>Increases Voodoo Power recovery rate</td><td style="text-align: center">6</td><td bgcolor="black">[[File:Staff_concentration.png]]</td></tr> |
</td><td>Increases Voodoo Power recovery rate</td><td style="text-align: center">6</td><td bgcolor="black">[[File:Staff_concentration.png]]</td></tr> |
||
| Line 234: | Line 387: | ||
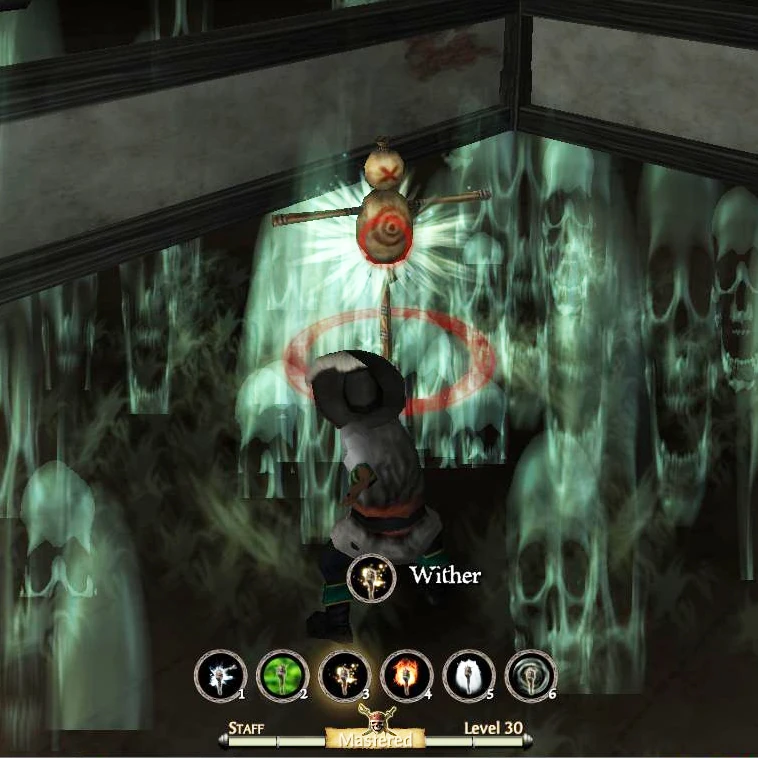
*The best way to level up the early levels of staff is to go to [[Kingshead]] and defeat the Veterans in the center with Wither. |
*The best way to level up the early levels of staff is to go to [[Kingshead]] and defeat the Veterans in the center with Wither. |
||
*Even though it's called a Voodoo "Staff", it says "Wand" when you get to the next level. This was changed so it correctly says "Staff". |
*Even though it's called a Voodoo "Staff", it says "Wand" when you get to the next level. This was changed so it correctly says "Staff". |
||
| − | *Staff is the only |
+ | *Staff is the only weapon class that has not received many new recent additions. This suggests that, like [[Voodoo Doll]] and [[Dagger]], new types may soon be added. You can see what these may be at [[Unreleased Items]] page. |
| + | |||
[[Category:Weapons]] |
[[Category:Weapons]] |
||
Latest revision as of 18:51, 7 May 2022
Definition
The Voodoo Staff is a magical item which can send quick energy blasts or even more powerful special attacks, such as Flaming Skull, or Desolation. You hold down the Left-Mouse button or the Ctrl button to charge it up. The staff is a widely respected weapon and widely used around the Caribbean for its power to destroy many enemies at once.
Even more powerful than a Voodoo Doll, staves (or staffs, as some pirates like to call them) allow a pirate to use voodoo spells against enemies at a distance. Unlike the voodoo doll, the staff does not have to be attuned to a target first. Most of the voodoo spells are line-of-sight or have an area or aura effect.
Level Up!

Leveling up your voodoo staff adds +4 HP, +6 Voodoo
Obtaining the Voodoo Staff
The staff is not available until the pirate reaches Notoriety level 30.
Once summoned by Tia Dalma, the pirate then sets about a major quest to assemble, then charge up the staff as part of the Voodoo Staff Unlock Quest.
The Voodoo Staff can also be unlocked by obtaining the Burnt Staff from the Raven's Cove Story Quest. Reciving the Burnt Staff will automatically unlock the Voodoo Staff weapon. The Voodoo Staff Unlock Quest will stay in the journal but will not need to be completed to use the Voodoo Staff. All that is needed to use the Voodoo Staff is the Cursed Staff which can be purchased from any of the Gypsy's.
With the new loot and inventory system, there are now four different types of staves. There are the original Voodoo Staves from before new weapons were released (Cursed Staff, Warped Staff, Rend Staff, Harrow Staff and Vile Staff), and new types of staves such as Dark Staves, Nature Staves, and Warding Staves.
These auras radiate around the staff user. Any pirate inside the aura will benefit from these effects.
The pirate will receive the Cursed Staff as their first voodoo staff, but more powerful ones are available from a gypsy or by completing additional quests, or from Loot drops. There are not many loot drop staves but most of them aren't very good if you have mastered the Voodoo Staff.
Use
Unlike a voodoo doll, which requires the user to attune their enemy or friend, the staff user just has to aim at their targets. The staff can however not be used to heal allies outside of the Nature Aura ability. To use a staff spell, hold down Ctrl or the Left-Mouse button to 'charge' up the staff before releasing the full spell. Each full casting takes voodoo power. The stronger the spell, the more voodoo it takes and the longer time it takes to cast.
If the spell is interrupted, or the user releases the attack key before the spell is complete, it 'fizzles' and there is no effect at all.
A user can also quickly click the attack button to release a Blast. Blast only deals marginal damage, but restores 50 voodoo per hit.
It does take time to charge most staff attacks, so when using it be aware that the enemy will attack you while you are charging unless the enemy is killed with one attack.
Types of Staves
| Crude * |
| Common |
| Rare |
| Famed |
| Legendary |
*There are no Crude Staves available in the game.
Voodoo Staff Skills
The staff greatly enhances the kinds of hexes and abilities the pirate can use with their voodoo power.

Hex Skills
Most of the Hexes a pirate can use with a voodoo staff are more intended for attacking a group of enemies from a distance, since the user does NOT have to attune it to them.
| Hex | Description | Voodoo Power | Cast Time | Level Req. | Icon |
|---|---|---|---|---|---|
| Blast | An instant blast of magic. | 0 | Instant | 1 | |
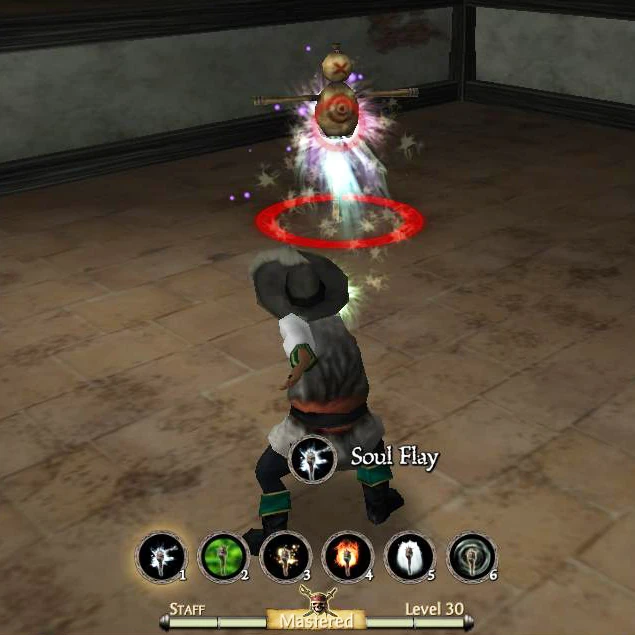
| Soul Flay | A stronger magic. | 30 | 1 | 1 | |
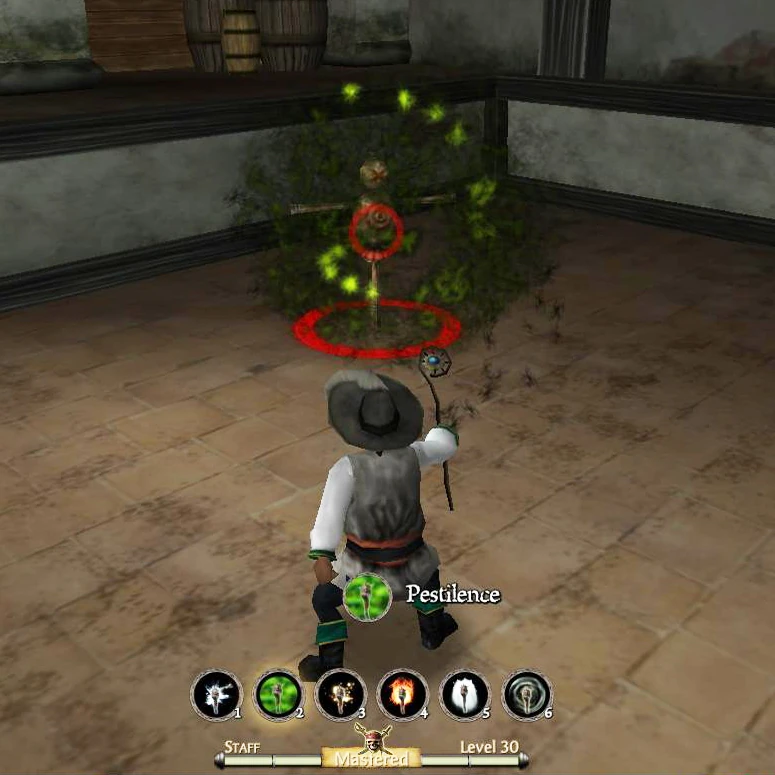
| Pestilence | A cloud of burning green acid engulfs the enemy. | 45 | 3 | 2 | |
| Wither | An aurora of teal magic damages any nearby enemy. | 60 | 2 | 4 | |
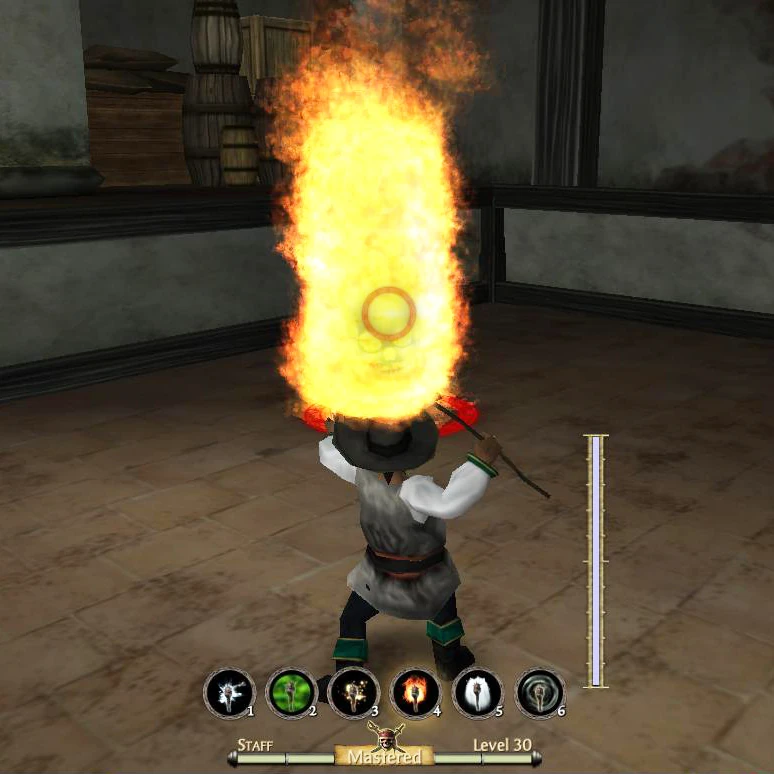
| Flaming Skull | A burning skull sets any enemy aflame in the line of sight. | 120 | 4 | 10 | |
| Banish | A strong hex that only works on Undead. | 210 | 8 | 14 | |
| Desolation | A graphic swirling storm of death. | 300 | 12 | 20 |
Passive Skills
In addition to hexes the pirate has to cast, the Voodoo Staff also can provide abilities that, once learned, are always in effect. These abilities can also apply to the user's Voodoo Doll as well.
| Hex | Description | Level Req. | Icon |
|---|---|---|---|
| Concentration | Increases Voodoo Power recovery rate | 6 | |
| Spirit Lore | Increases staff casting speed | 8 | |
| Conservation | Decreases amount of Voodoo Power used by Staff and Doll | 12 | |
| Spirit Mastery | Increases the damage by Staff and Doll | 17 |
Notes
- The best way to level up the early levels of staff is to go to Kingshead and defeat the Veterans in the center with Wither.
- Even though it's called a Voodoo "Staff", it says "Wand" when you get to the next level. This was changed so it correctly says "Staff".
- Staff is the only weapon class that has not received many new recent additions. This suggests that, like Voodoo Doll and Dagger, new types may soon be added. You can see what these may be at Unreleased Items page.
-
Staff of Rebirth -

Staff of the Hollowed Gem -

Burnt Staff -
Cajun Staff -

Demon Skull Staff -
Harrow Staff -
Staff of Lava -

Dark Omen
All items (61)


-
Singed Staff

-
Skeletal Staff

-
Skull Staff

-
Soul Eater Staff

-
Soul Harvester Staff

-
Soul Reaper Staff

-
Spirit Burner Staff

-
Spirit Caller Staff

-
Spirit Shredder Staff

-
Staff of Ice

-
Staff of Lava

-
Staff of Rebirth

-
Staff of Shrunken Heads

-
Staff of the Hollowed Gem

-
Staff of the Sacred Moon

-
Staff of the Sacred Owl

-
Staff of the Sacred Stars

-
Staff of the Sacred Sun

-
Staff of Water

-
Stone Guard Staff


